Migrating to BLT - Part 2
OK, so you have your site locally running after Part 1, now it’s time to deploy it. As before I’m basing this on BLT version 8.8.3.
Deployment basics
As shown in the last post, you don’t need much else besides blt deploy and as the manual states you can combine multiple commands as such to push directly to the remote repository defined in your project.yml:
blt deploy -Ddeploy.branch="master" -Ddeploy.commitMsg="Your message"
You can run this locally and the target repository now should contain your built site.
I personally prefer to push a tagged branch but as of now one can only push tags without branches, meaning you’d be in detached head. Check this issue for more information and choose either branch or tag for now.
Tip: Make sure that your CI server has a recent Git version, or force pushing might give interesting results. (It’s automatically checked in the next release 😎)
Automating it
I have all my projects on a Gitlab server with Gitlab CI, so naturally I was looking for a way to do the CI integration without the already supported platforms, such as Travis. If you run blt ci:travis:init the resulting Travis-file contains basically all the information you need.
Here for example I’ve taken some setup information from the before_install phase and adapted it to for a minimal example, which is triggered on certain tags.
stages:
  - build
  - deploy

make-release:
  stage: build
  script:
    - composer self-update
    - composer validate --no-check-all --ansi
    - composer install
    - vendor/bin/blt validate:all
    - vendor/bin/blt deploy -Ddeploy.branch="master-build" -Ddeploy.commitMsg="Release $CI_COMMIT_REF_NAME"
  only:
    - /^release/.*$/

prod-deployment:
  stage: deploy
  variables:
    LOGIN: 'user@host'
    APP_PATH: '/var/www/directory'
  script:
    - ssh -T $LOGIN "cd $APP_PATH && git pull"
    - ssh -T $LOGIN "cd $APP_PATH && vendor/bin/blt setup:update"
  only:
    - /^release/.*$/
  dependencies:
    - make-release
  environment:
      name: production
Caveats and tips
- I like to make a database update at the beginning of the deploy stage and usually set the Environment Indicator to the release number via_
drush sset environment_indicator.current_release $VAR. - Have a look at vendor/acquia/blt/scripts/travis to see see what would be required to run all tests, which is somewhat out of scope of this tutorial but definitely recommended.
- This example assumes that you’d initially set up your prod environment manually and have added the relevant settings in local.project.yml and local.settings.php.
Using configuration split
If you run local|setup|deploy:update you might have noticed that the rules under “modules” in project.yml activate and deactivate modules after everything has run, which is not ideal. So let’s just empty all those rules with { }. But I’d be really nice to have environment-specific configuration as the example shows for devel, views_ui and so on, which is where config_split comes in.
Out-of-the-box BLT provides folders for ci and default but otherwise hasn’t enabled these. The blog post by Jeff Geerling provides general information but isn’t quite up-to-date.
However, you hardly need to do anything: Just enable the profiles in the backend with the common names such local, ci, test, prod and start using them. If you have config_filter enabled, you can just use cim/cex without any additional parameters and can ignore csex/csim.
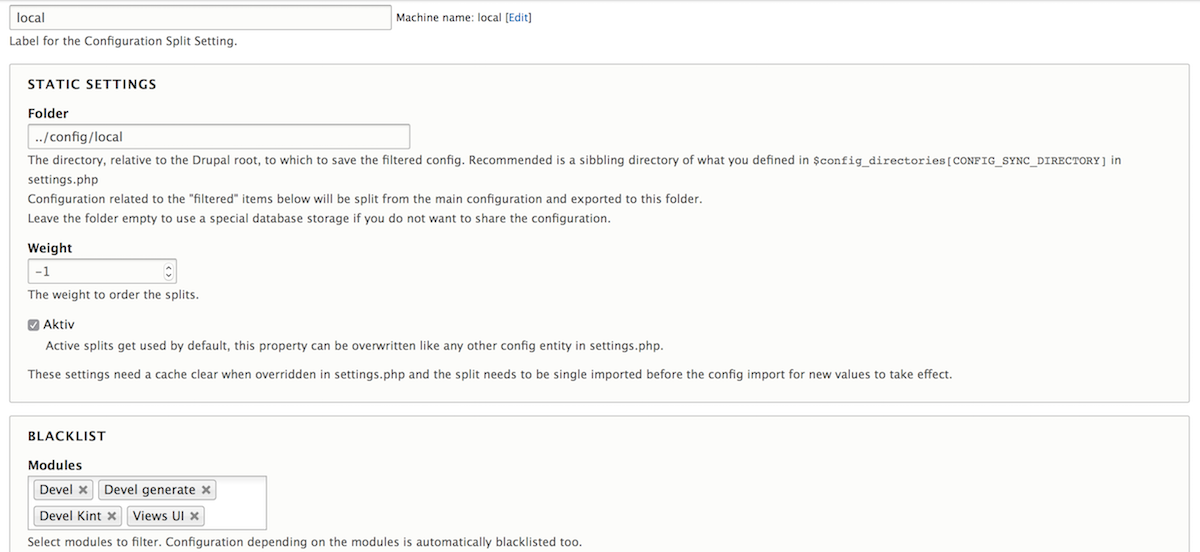
The thing which confused me the longest time is the wording of configuration split, where blacklisting actually means that I want to keep something only within this environment (e.g. devel locally) and graylisting means I don’t want to overwrite something (such as webform forms on production). Thankfully, people are working on that.
So there you go, deployment on BLT with a minimum of moving parts on your own stack.